How to Set Up Google Ads Conversion Tracking for Shopify
You’re running Google Ads for your Shopify store, but you have no idea which campaigns actually drive sales. Every click costs money, yet the connection between ad spend and revenue remains invisible.
Google Ads conversion tracking solves this by reporting back to Google whenever someone who clicked your ad completes a purchase or other valuable action on your store. This guide walks through three setup methods, verification steps, common troubleshooting issues, and best practices for accurate tracking.
What Is Google Ads Conversion Tracking?
Google Ads conversion tracking connects ad clicks to customer actions on your Shopify store. Think of it as a receipt that gets sent back to Google whenever someone who clicked your ad completes a valuable action—like making a purchase or starting checkout.
Without this connection, Google Ads has no way of knowing which clicks led to sales. You’re paying for traffic without any feedback loop telling you whether that traffic actually converted. The tracking works by placing a small piece of code on your store that fires when specific events happen, then reports those events back to your Google Ads account.
Why Shopify Stores Need Conversion Tracking for Google Ads
Running Google Ads without conversion tracking is like driving with your dashboard lights off. You know you’re spending money, but you can’t see which campaigns generate purchases versus which ones drain your budget.
Once tracking is in place, you gain visibility into what’s working. You can compare cost per conversion across campaigns, identify your highest-performing keywords, and calculate true return on ad spend (ROAS).
- Optimize ad spend: Stop funding campaigns that generate clicks but no purchases
- Enable Smart Bidding: Google’s automated bidding strategies rely on conversion data to optimize toward your goals
- Measure true ROAS: Connect ad clicks directly to Shopify orders instead of guessing
Google’s machine learning algorithms get smarter with more conversion data. The more accurately you track, the better Google can find customers similar to those who already bought from you.
What Conversions to Track on Your Shopify Store
Purchases and Completed Orders
The purchase event is your primary conversion—the moment a customer completes checkout and you receive an order. Every Shopify store running Google Ads wants this conversion configured correctly because it directly ties ad spend to revenue.
Add to Cart and Checkout Starts
Add-to-cart and checkout-start events indicate purchase intent before the final sale. Someone adding a product to their cart has shown real interest, even if they don’t buy immediately.
Tracking checkout starts helps you understand where customers drop off between interest and purchase. If you see many checkout starts but few completed orders, you’ve identified a friction point worth investigating.
Other Valuable Actions
Depending on your business model, you might also track newsletter signups, account creations, or views of key pages. Secondary conversions give a fuller picture of the customer journey and help Google’s algorithms learn faster.
| Conversion Type | What It Tracks | Why It Matters |
|---|---|---|
| Purchase | Completed orders | Primary revenue metric |
| Add to Cart | Products added to cart | Measures product interest |
| Begin Checkout | Checkout initiated | Shows purchase intent |
| Page View | Key pages visited | Tracks engagement |
>> See more: 15 Proven Ways to Improve Shopify Conversion Rate in 2026
How to Set Up Google Ads Conversion Tracking in Shopify
Three main methods exist for implementing conversion tracking, each with different complexity levels. Your choice depends on technical comfort and how much control you want over the tracking setup.
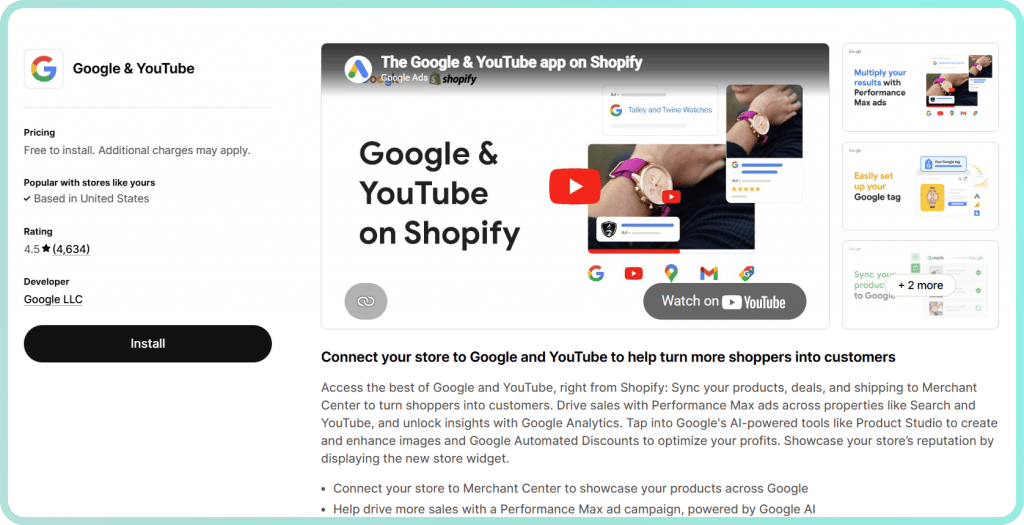
Method 1: Using the Google and YouTube App
The official Google & YouTube app handles the technical setup automatically and maintains the connection between your store and Google Ads. For most Shopify merchants, this is the simplest approach.
- Install the Google & YouTube app from the Shopify App Store
- Connect your Google Ads account within the app
- Enable conversion tracking in settings
- Confirm the Google tag appears on your store
The app automatically tracks purchases and sends conversion data to Google Ads. For basic tracking, this method works well and requires no code changes.
Method 2: Using Google Tag Manager
Google Tag Manager (GTM) acts as a container that holds all your tracking tags in one place. This method offers more control and supports advanced features like enhanced conversions.
- Create a GTM container and add the code to your Shopify theme
- Create a new conversion action in Google Ads
- Copy the Conversion ID and Conversion Label
- Create a Google Ads Conversion Tracking tag in GTM
- Set the trigger to fire on your order confirmation page
GTM is particularly useful if you’re running multiple tracking pixels or want to implement custom conversion events. The learning curve is steeper, but the flexibility often justifies the effort.
Method 3: Adding the Tracking Code Manually
For merchants who want direct control without GTM, you can add the Google tag directly to your Shopify theme code. This involves placing the global site tag in your theme’s header and the event snippet on your checkout or thank-you page.
On Shopify Plus stores using checkout extensibility, you’ll add the tracking pixel through Shopify’s Customer Events settings rather than editing checkout code directly. Standard Shopify stores can add conversion tracking through the Additional Scripts section in checkout settings.
How to Verify Your Shopify Conversion Tracking Is Working
Setup isn’t complete until you’ve confirmed the tracking actually fires. Broken tracking means wasted ad spend and incorrect optimization—Google can’t improve what it can’t measure.
Use Google Tag Assistant to Test
Google Tag Assistant is a Chrome extension that shows which tags fire on any page. Install it, then place a test order on your store while watching the extension.
Navigate through your checkout process and confirm the conversion tag fires on the order confirmation page. The extension will show you the tag name, status, and any errors that occurred.
Check Conversion Status in Google Ads
In your Google Ads account, navigate to Goals > Conversions and check the status column. You’ll see one of several statuses:
- Recording conversions: Everything is working correctly
- No recent conversions: The tag is installed but hasn’t recorded any conversions yet
- Unverified: Google hasn’t detected the tag on your site
If you see “Unverified” after 24 hours, revisit your installation steps.
Compare Shopify Orders to Google Ads Reports
After a few days of live tracking, compare your Shopify order data to Google Ads conversion reports. Some variance is normal—attribution windows, cross-device behavior, and ad blockers all create discrepancies.
A 10-20% difference between platforms is typical. Larger gaps suggest a tracking problem worth investigating.
Common Shopify Google Ads Tracking Issues and How to Fix Them
Even with careful setup, tracking problems happen. Here are the issues merchants encounter most frequently.
Conversions Not Appearing in Google Ads
First, verify the tag fires on the correct page. The conversion tag belongs on the thank-you or order confirmation page—not the checkout page itself. Firing too early means you’re counting checkout starts as purchases.
Double-check that your Conversion ID and Conversion Label match exactly what’s in Google Ads. A single character difference breaks the connection. Also note that ad blockers can prevent tags from firing during your own testing.
Conversion Numbers Don’t Match Shopify Orders
Google Ads and Shopify count conversions differently. Google uses attribution windows—the time between ad click and conversion that gets credit. A customer might click your ad on Monday and purchase on Thursday; Google still attributes that conversion to Monday’s click.
Cross-device journeys add complexity too. Someone might click your ad on mobile, then complete the purchase on desktop later. Cookie restrictions and privacy settings can prevent Google from connecting sessions across devices.
Tracking Breaks After Theme or Checkout Changes
Shopify theme updates can remove manually added tracking code. If you’ve placed conversion tags directly in your theme files, any theme update or switch might delete them.
Using the Google & YouTube app or Google Tag Manager protects your setup from theme changes. Both methods store tracking configuration outside your theme code. Consider auditing your tracking monthly to catch silent failures before they waste significant budget.
Enhanced Conversions Not Sending Data
Enhanced conversions use hashed customer data—like email addresses—to improve attribution accuracy when cookies fail. If you’ve enabled enhanced conversions but aren’t seeing improved data, check that customer email is being captured and passed correctly.
Consent settings can also block data transmission. If your consent banner prevents tracking scripts from loading for certain visitors, conversions from those visitors won’t be recorded.
Best Practices for Accurate Shopify Conversion Tracking
Set Attribution Windows That Match Your Sales Cycle
The attribution window determines how long after an ad click a conversion can be credited to that click. Google Ads defaults to 30 days for clicks, but this might not match your business.
Impulse purchases might warrant a 7-day window. Considered purchases—furniture, electronics, high-ticket items—might justify 60 or 90 days. Align your attribution window with how long your customers typically take to decide.
Enable Enhanced Conversions for Better Data
Privacy changes have reduced the accuracy of cookie-based tracking. Enhanced conversions address this by sending hashed first-party data (email, phone number, address) to Google, which matches it against signed-in Google users.
The data is hashed before transmission, meaning Google receives encrypted information rather than raw personal details.
Track Both Micro and Macro Conversions
Macro conversions alone don’t show the full funnel. If you only track purchases, you can’t see where potential customers drop off before buying.
Tracking add-to-cart and checkout-start events helps Google’s bidding algorithms learn faster—especially for new campaigns without much conversion history. Micro conversions also reveal friction points in your purchase flow.
Audit Your Tracking Monthly
Set a recurring reminder to verify your tracking. Place a test order, confirm the tag fires, and compare Shopify versus Google Ads numbers. A simple monthly check prevents silent tracking failures from wasting budget for weeks.
Tip: Create a checklist: test order placed, Tag Assistant shows conversion firing, Google Ads status shows “Recording conversions,” and weekly conversion counts roughly match Shopify orders.
What Conversion Data Alone Won’t Tell You
Conversion tracking tells you what happened—a sale, an abandoned checkout, a cart that never reached checkout. It doesn’t tell you why.
You might see that 70% of visitors who start checkout don’t complete it. But the conversion data can’t show you the hesitation before they left, the rage click on a shipping calculator that wasn’t loading, or the confusion when discount codes didn’t apply correctly.
- Conversion tracking shows: Someone abandoned checkout
- Behavior analytics shows: They rage-clicked the shipping calculator that wasn’t loading
Understanding the behavior behind conversions helps you fix friction and improve your Shopify Google Ads performance beyond tracking alone. When you can watch the exact session where someone abandoned, you see the problem—not just the symptom.
Turn Conversion Insights into Store Improvements
Once tracking is working, the next step is understanding why conversions happen or don’t. Conversion data identifies which campaigns drive purchases; behavior data reveals what happens between the click and the outcome.
Tools like MIDA connect session replays directly to orders and abandoned checkouts. Instead of wondering why your checkout abandonment rate is high, you can watch the exact sessions where customers left and see what happened.
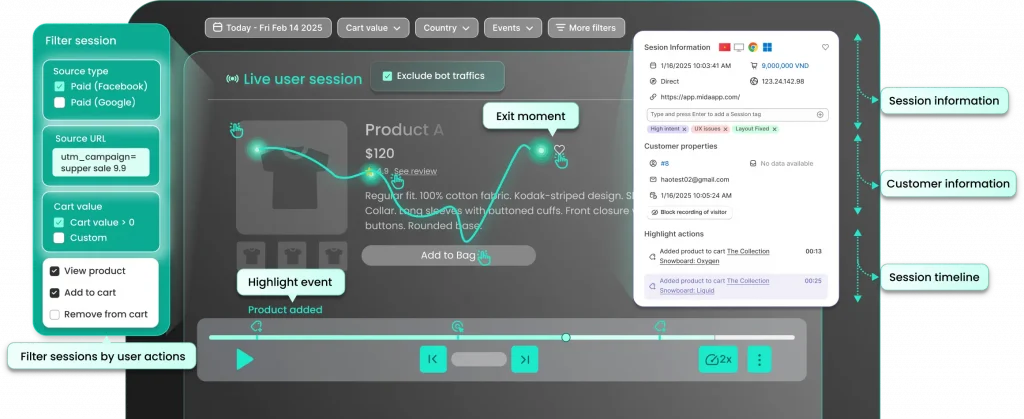
Try MIDA for free to see how connecting behavior to revenue changes the way you optimize.
FAQs About Google Ads Conversion Tracking for Shopify
Does Google Ads conversion tracking work with Shopify checkout extensibility?
Yes, conversion tracking works with Shopify checkout extensibility. You’ll add the tracking pixel through Shopify’s Customer Events settings rather than directly editing checkout code, which actually makes the setup more stable across theme changes.
How long does it take for conversions to appear in Google Ads after setup?
Conversions typically appear in Google Ads within a few hours of occurring. However, it can take up to 24 hours for data to fully process and display in reports, so don’t panic if you don’t see immediate results after setup.
Can one tracking setup measure both Google Search and Google Shopping conversions?
Yes, a single conversion action in Google Ads tracks conversions from Search, Shopping, Display, and other campaign types. As long as the tracking code fires on your Shopify order confirmation page, it captures conversions regardless of which campaign type drove the click.
What happens to conversion tracking if you change your Shopify theme?
Changing your Shopify theme can remove manually added tracking code. Using the Google & YouTube app or Google Tag Manager protects your setup because both methods store tracking configuration outside your theme files.
How do privacy regulations like GDPR affect Shopify conversion tracking?
Privacy regulations require you to obtain consent before tracking visitors from regions like the EU. Without consent, conversions from those visitors won’t be recorded—which can create gaps in your data and make certain geographic markets appear less profitable than they actually are.

Hien Tran
I’m Hien Tran, a Product Marketing Executive at MIDA, specializing in eCommerce growth and conversion optimization. I focus on bridging product capabilities with real merchant needs—turning insights from heatmaps, session replays, and funnel analytics into actionable strategies that drive measurable results.


